Table of Contents
The Elementor is a versatile and simple plugin for WordPress. Don’t need any coding knowledge to use Elementor for creating a website. This plugin is freely available on the WordPress plugin store.
Are you a beginner in digital marketing? You can make editing your website easy and user-friendly with these plugins.
In this article, we are going to describe the basic Elementor widgets for beginners.
Installing Elementor
There are two ways we install the Elementor in WordPress.
Method 1: Go to the Elementor website and you can download the zip file directly with a registered account.
Method 2: You can download the Elementor plugin on the WordPress plugin store, it’s freely available.

Elementor plugin has drag and drop interface, users can customize a website in anyway way they want. Elementor comes with 500 free digital assets and they are easily customizable. If you use Elementor on your website, then you can fully control and access the website without a programming language.
The Elementor plugin is a drag and drop interface, a user can customize a website any way they want. The Elementor comes with 500 free digital assets, and they are easily customizable. If you use Elementor on your website, then you can modify the website without a programming language. Elementor plugin is always a charm of existence for your blog.
What Widgets are Included in Elementor?
There are many assets available in Elementor with free and paid options. Here we listed out the basic widgets.
- Sections
- Columns
- Widgets
- Heading
- Image
- Text Editor
- Video
- Button
- Divider
- Icon
- Spacer
- Google Maps
1. Elementor Structure
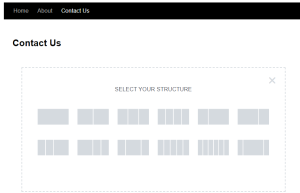
The structure is important for all columns and sections. You can easily split the sections with structure. Elementor comes with inbuilt structures.
2. Editing Sections, Columns, Elements in Elementor
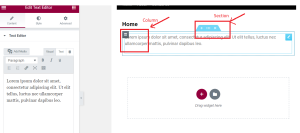
Before you start using the Elementor, you should know the difference between a section and a column. The section contains whole column elements, you can easily add multiple columns inside the section with the plus (+ ) symbol.
3. Setting Margins and Padding
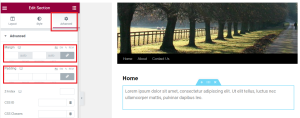
Once you create a column, then you will adjust your column margin and padding what you want on your website design.
Margins – Margins are the outside space of your Element.
Padding – Padding is the inside space of your Element.
4. Changing Font Size and Colour
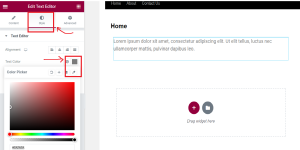
If you click the section or column, Elementor will show the customize panel on the left side. You can simply click the style icon and colorize your part. It already has a default color for every section. So, you can change your color with a color picker.
5. Change Your Website Fonts and Typography in Elementor
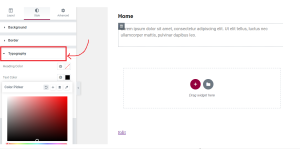
You can click the Typography button and change your font style, size, color, and weight. Here you can control all the font customization activities with the Elementor.
6. Adjusting the Backgrounds
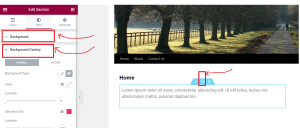
If you click the section, then it will show the “Edit Section” on the left side. Then you can choose the style select Background options on Elementor panels. Here you can do all the background activities like image overlay, image gradient, and much more.
7. Device View
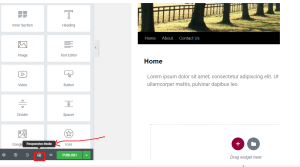
First, you should click the “Responsive mode“. Once the responsive mode enables, the browser will show the device options on the top page.
Elementor provides device view options for the business website. So, you can view your site view on mobile, desktop, and tab view. This option is visible at the top of every page. Simply you can click the device icons and adjust your site view.
8. Publish pages through Elementor

Once you will be done with the changes to your website, then click the publish button.
Conclusion
This article covers only the basic elements of the Elementor, not the advanced level. If you were looking for a beginner WordPress tutorial, this blog will guide you to use Elementor.


